Showing posts with label How To. Show all posts

17 Mar 2024

More Nikon 16mm Fisheye Experimenting

The Nikon 16mm Fisheye lens is a quite remarkable piece of tech in that it can actually record a full 180°. This sucker can see sideways! But straight from the camera the best I could get was this:

Not as wide as hoped and of course a little dull and dark... put it through DxO PL6, adjusted a few settings and discovered that there was more photo that was not originally revealed:

I then decided to squeeze a bit more out, played with the manual distortion buttons a bit as well and got this very wide and less fisheye looking photo:

Along the way I found that this lens really has very limited use but if used creatively in the right setting it can deliver interesting results. Not every bodies cup of tea, but interesting none the less.


16 Mar 2024

Tulips in the Studio

Decided to shoot some tulips in my tiny studio. 

Nikon D850, 24-120mm f4 lens @120mm, f11, two Speedlights fired and controlled wirelessly via Nikons CLS & shot through an octobox to camera right and a gobo from under the table onto the background. Handheld throughout. I have posted a pullback shot at the end so you can see the light setup and layout.


...and lastly the promised pullback shot:


10 Apr 2023

Rare Selfie Time...

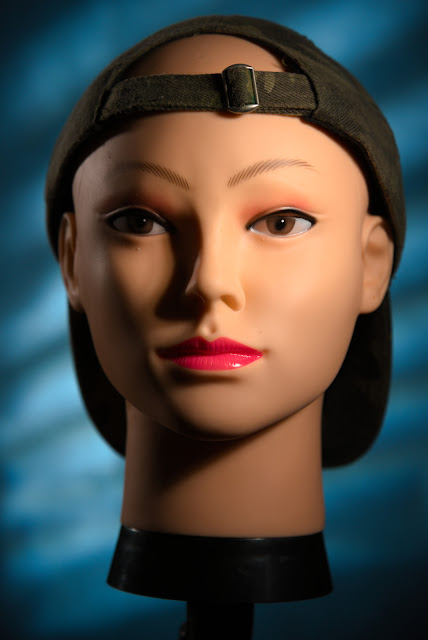
It's not often that photographs get taken of me, mostly because I am always behind the camera. Today, just for once, I wanted to try out the portrait set-up that I have been shooting with the plastic head but using a real human head for a change and the only available (read "willing") sucker human at home today was me. So for better or worse you get to see my scruffy face today... 😱

First shot is a colour version of my scruffy face, second is the whole set-up but with the plastic head in my place, third shot is a 100% crop to show the totally insane resolution of the D850, and finally a B&W version of my scruffy face. B&W doesn't make me look any better though...

Colour version

Set-up shot

100% crop

B&W version


8 Apr 2023

Final Fun With the Plastic Head (for now)

 Ok, just one more post featuring the world's most patient head-shot model. At least for now... it has been fun though.

As before I used my D750 and three Speedlights controlled wirelessly. The only change was using an Elinchrom softbox for the rear fill instead of the reflector I used before. 

Just two pics (plus one bonus pic...), the final image and a pull-back shot. You get the picture.

In the "bonus" pic below I just substituted some Christmas lights in the place of the Speedlight powered gobo used above to provide a somewhat sparkly background for a change.


7 Apr 2023

Another Day Another Portrait Setup...

Another day another portrait setup in my little studio. This time my main light is an SB-910 shot through a gridded 95cm octobox, fill light is an SB-700 shot through a gridded 18cm reflector and the background light is an SB-600 shot through a gobo to provide a single ray of light. All speedlights are controlled wirelessly via Nikons CLS system useing an SU-800 Commander unit mounted to a D750. 

I really like the quality of the light from the octobox, it is large enough to give a nice fall-off of light around the face, has two diffusers to soften and even up the light and doesn't show any hotspots anywhere on the face.

Final image

Pull-back shot so you can see where the lights are placed

1 Apr 2023

Three Light Portrait

 The plastic fantastic headshot model agreed to sit for another portrait session today (well she didn't say no...) and I decided to go with three lights this time around. The main light is an sb700 shot through reflector with grid attached from camera right. Fill light is an sb600 also through a reflector with grid attached. The background light is an sb910 shot through a gobo and fresnel lens system from MagMod. All taken with a D750 and 24-120mm f4 lens at 120mm & aperture priority f5.6. The lights were all controlled and fired wirelessly via an su-800 Commander unit.

The first image is the final shot, followed by a pullback set-up shot and then main and background light individually just to show the effect each light has on the image, with final shot to show the fill in the shadows.

Final image.

1 Sept 2017

Wide vs Tele - Which One is Best?

I am often asked why peoples selfies make their faces look distorted and my answer is always the same, serves you right you narcissistic fool! Well no, not really. But the right answer is that the lens on your front cell phone camera is wide and therefore distorts your face making your nose look big.

In regular photography shooting with a wide lens close up has the same result, whatever is closest to the camera looks bigger and therefore the resulting picture is distorted and not a realistic representation of whatever it is you are photographing.

However, this also opens up some creative possibilities. Deliberate wide angle distortion can provide some artistic flair, or interest, or emotional tension, or merely highlight a certain part of an object or product.

I recently took some photos of my beloved motorcycle and was using my nifty Tamron 17-50mm 2.8 lens. The first photo was taken at 50mm and the second at 17mm. Which is best? Well that depends on what you are trying to achieve, your own personal taste, etc.

The tele produces a realistic representation of the subject at hand,  but to me the wide angle produces an entirely more interesting and dramatic photograph and leaves the viewer with a little more awe and wonder.  But that's just me.

Tele

Wide

So which one do you prefer?

8 Jun 2013

Mmmmm, beer! - Lighting is in Layers.

I like to think of setting up lighting as adding a series of carefully thought out layers. I normally start out with a background, work out the lighting for it and then slowly add layers until I match the vision I had in my minds eye for the particular subject.

Here is a final shot of a glass of beer and the can and then I will show the various "layers" of light as I added them in my quest for this photograph:

6 Jun 2013

Three Light Product Photography Tutorial

Today I have a quick and simple "how to" on putting together a nice slightly low key product shot with three lights. Here is the final result and then I will go through the steps on how to build the lighting to get this photograph:


31 May 2013

How to Enlarge Your Lightsource for Softer Light, easily.

I did a little experiment this evening just to demonstrate how to make a really large lightsource and give much more even light on your subject than just blasting away with direct light.

I have two 65x65cm light boxes that are quite handy. So here is a pic of them set up pointing directly at a nice Dutch vase. The camera was on the tripod in front of the table.


From here it looks like that should make for some pretty good light on the vase, but as we can see in the next photo they also leave some not so great specular highlights on the vase and two distinct shadow areas behind the vase.


Not a bad photograph as such, but we can do much better than that! So, in order to increase the overall size of the light source I simply faced the lights up at the ceiling. Of course I also had to increase the power output of the lights because the light now had much further to travel and the inverse square law robs us of light very quickly when we increase the distance the light has to travel.


As you can see from the pic above the light has now been spread over a much larger area. So what has that done for our lovely Dutch vase?


Well the first thing you notice is that the ugly specular highlights have vanished and the light is much more evenly spread on the vase itself. The second thing is that the shadows behind the vase have also disappeared. Overall a much more pleasing result!

If all you have are two speedlights instead of the bigger studio lights then don't be disheartened because the exact same principle still holds true and will work just great. Simply pump up the power a bit and let 'er rip, it will have a similar wonderful softening effect on the quality of light.

Happy product photographing folks!

19 Jan 2013

Another Take on Photographing a Bottle of Wine


As you know I recently posted something on shooting a bottle of wine in a light tent, to see it CLICK HERE.

Well, this time around I wanted to try something a little different than the last shoot and go for an entirely different look.

The Power of Bounced Flash!


Nikon sb600 atop my D300s turned backwards and about 45° upwards to bounce onto the wall and ceiling behind me. This simple technique resulted in even and soft lighting from a large light source and great highlights in the eyes of the subjects!

10 Oct 2012

So what exactly does a Circular Polarising Filter do?

I was asked by someone recently what a polarizing filter does and was it worth paying so money much for one? Well, the only way to answer this question is by example, so I set up, with a little help from God and nature, a perfect test area with a huge amount of reflection on wet leaves coming from the diffused light of the sun. Please note, these are for test and display purposes only and are not meant to look remotely pleasant to the eyes.

Here is the special test area unpolarized:


The leaves are wet and reflecting a lot of light into the lens and giving much less than desirable results. Or to use a highly technical term, "it looks yucky"!

Here is the exact same scene, a few seconds later, with the polarizing filter applied. It is simple enough to use, you simply rotate it until the shine goes away! Just remember to look through the viewer while you are doing this or you will not be able to see when you have achieved optimal effect. Live view works just as well.


The first thing you will notice, of course, is that the shine is gone! Vanished into thin air! The second thing that you will notice, is that the greens of the leaves are beautifully saturated, and the picture just looks better in every way. All that shine plays havoc with metering and exposure.

If you intend to photograph gardens, landscapes or shiny cars and buildings a circular polariser is a great idea that will assist you to get much better results by taking away the shine. In landscapes it will also give a beautiful deep blue sky, but it may not look great using wider lenses because the polariser will only turn part of the sky dark blue and it could all end up looking a little strange. Some people like this effect and do it on purpose.

Please note that the polariser reduces the amount of light entering the lens and so in low light shutter speeds may drop too low to hand hold requiring you to use a tripod.

Happy light hunting!

26 Sept 2011

Bowl of Rice


And below the set-up shot for "Bowl of Rice".


Normally I would try to get rid of the light spill from the flash shooting into the umbrella, but in this case it actually helped with the light I was trying to achieve by reflecting some light from slightly behind the subject.

Nikon D90, Nikkor 50mm f1.8D, f4.5, 1/200s, Nikon sb700 flash shot through a white umbrella with the wide angle flash diffuser out, hand held.

13 Aug 2011

Seamless White Background - How To

Just in case anybody was wondering how complicated it is to do a seamless white background product photo shot like the one below, I have included a shot at the bottom of this post to show how simple it can be done.


...and the promised setup shot:


Really not complicated at all! The flash was triggered via Nikon's cool CLS system. The groovy light stand is explained at another post here.


2 Feb 2011

More on the junky tripod to super cool light stand conversion...

Ok, so maybe the light stand from a tripod is not super cool, but it was fun and more importantly it worked! So maybe fairly cool then.

Basically I had an old cheapy tripod that came with my Nikon F65 when I bought it for next to nothing. During November I needed a light stand to get my flash and shoot-through umbrella higher than an average cheapy tripod can manage, so I looked to the tripod that was too light to hold an SLR camera steady.

First I detached the head from the aluminium pipe it was mounted to and got this:


The black and white bits top and middle of the pipe will be explained soon.

I then took a piece of chromed curtain rod of the right diameter to fit the head mount and stuck the business end of the head mount into the pipe, drilled a small hole and screwed it in both sides like so:


See the screw? Easy, with only basic DIY skills needed... and a drill... with a suitable sized drill bit. If you don't know what a drill bit is just ask your friends and the first one that knows has earned the privilege of assisting you with this little project! ;-)

Next up I had to drill a hole into the head somewhere, without destroying the heads usefulness, for the umbrella shaft to be pushed in to. Time to ask the DIY savvy friend for help again... Here is where I put my hole, yours may be in a different spot. (You will have to use some common sense on this step.)


I chose that particular position because the drill bit could go all the way through without damaging any important bits inside. Make sure you get this right otherwise you may render you old tripod head quite unable to mount the flash. Also make sure that the diameter of the drill bit is the same as the umbrella shaft, too small and it won't mount, too big and it will fall out.

While it looks oh so neat from the outside, I'm afraid the same cannot be said of the inside, but heck, nobody looks in there anyway... except all of the readers of this blog. Darn!


This is what it looks like with the umbrella inserted into the hole. NICE!


Finally, in order for the curtain rod to fit snugly over the original aluminium pipe that the head used to be mounted to I simply wrapped some electrical tape top and middle and by simple trial and error got it just right:


So that's what those black and white things were! I wanted it to be easily portable, so that's why I didn't screw the curtain rod to the tripod. Now it simply pulls off!

Here's the whole lot together:


The dangly bit hanging from the umbrella shaft is a long balloon that I tie onto the shaft to stop it from sliding in when it is pointed up to use as a bounce umbrella, or I tie it on the other side to stop it from falling out when I am shooting through and it is pointed down. Simple is good.

Here is a pic of the set-up using this rig while shooting Santa in December:


It worked flawlessly!

Here is another shot taken with the same:


This last one was bounced to cover more area while the Santa shots were all shot through the umbrella.

I should probably have just gone and bought a light stand but hey it would not have been half as much fun!
(This was also free since I had all the bits...) (No, not drill bits... ask your friend.)

29 Dec 2010

Eliminate That Hotspot!

While I was out shooting Santa last week I had some spare time to play with my flash and shoot through umbrella set-up and took the following shot:


As you can see there is a distinct hotspot in the umbrella. Not so great for even distribution of light, which is the point of the umbrella to start off with. Of course it does help to distribute light, but not as well as it could. The flash was set to about 50mm here, so I flipped out the built in diffuser and it automatically went to 14mm wide with the following result:


Beautiful even distribution of light resulting in a better wrap around effect for portraits!

The light stand used here is in fact a junky old cheap tripod with the head removed and refitted to an extension pole which I then mounted to the top of the junky old cheap tripod, I then drilled a hole through the plastic head (taking care to avoid anything important) and voila! Nice tall light stand for the man on a limited budget. Here is a close up of the head:


Some people say I'm tight, but I like to think of myself as frugal...
;-)

23 Oct 2010

Strobist DIY Beauty Dish, on the cheap!

Some of you may remember that a while back I made my own flash diffuser. The original post is here. Well, I am sad to say that it was a dismal failure! In fact I couldn't tell the difference between photos taken with or without my diffusion disaster... at least it didn't cost me anything!

But for some time now I have wanted to build something more effective, a Strobist DIY Beauty Dish! Woohoo! But would it work?

Stuff I used:

1. Old flower pot
2. CD spindle case
3. White and black spray paint
4. Plain white piece of plastic
5. 4mm rivets and washers
6. White silicon
7. Stanley knife